Silicone Caulk vs Acrylic Latex Caulk | Useful Interior Caulking Tips
A reader recently asked,
“Can you talk about how to caulk indoors? Like in bathroom sinks, bathtubs, and kitchen sinks. I also wanted to ask where to apply interior caulking.”
In this guide, we delve into the nuances of indoor caulking, focusing on the effective use of silicone caulk and acrylic latex caulk. This interior caulking tip guide will explore the importance of selecting the right caulk for specific tasks, provide insightful tips for seamless application, and offer guidance on maintaining a pristine finish.
As a homeowner, interior caulking is a crucial aspect of maintaining the integrity and aesthetics of your interior living space. From sealing gaps around doors and windows to ensuring watertight seals in high-moisture areas like bathrooms and kitchens, the correct application of caulk can make a significant difference in the longevity and appearance of your home.
Difference Between Sealants and Caulk
What is the difference between sealants and caulk?
Sealants create air-tight and water-tight seals in construction while caulks are used for filling gaps in various household applications like sealing spaces between walls and baseboards, around windows and doors.
In this blog, we will focus on the unique properties of silicone and acrylic latex caulks, highlighting their respective strengths and ideal usage scenarios. Understanding the distinction between these materials will lay the foundation for successful caulking projects, ensuring that you pick the right caulk for the job.
Acrylic Latex Caulk
Acrylic latex caulk is a popular choice for indoor caulking projects because of its ease of use, versatility, and ability to create a smooth, polished finish. From sealing gaps around windows and doors to filling cracks in baseboards and trims, it has proven to be a valuable asset in achieving a professional, seamless look throughout the interior of a home. Some can be waterproof but, I would refrain from using them around sinks and bathtubs.
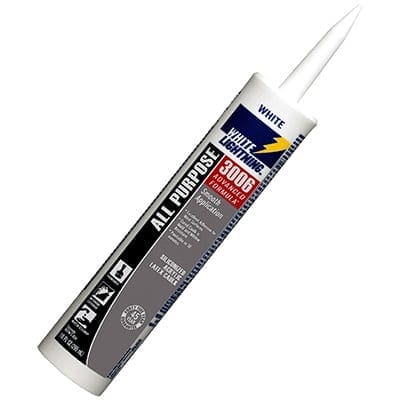
Our favorite tube of Acrylic Latex caulk is White Lightning All Purpose 3006 Advanced Formula.

Silicone Caulk
With moisture-prone areas such as bathrooms and kitchens, caulk made from silicone emerges as a reliable and durable solution. Despite its sticky nature and specific application challenges, it offers unparalleled water resistance and adhesion, making it a great product for achieving watertight seals around sinks, bathtubs, and showers.
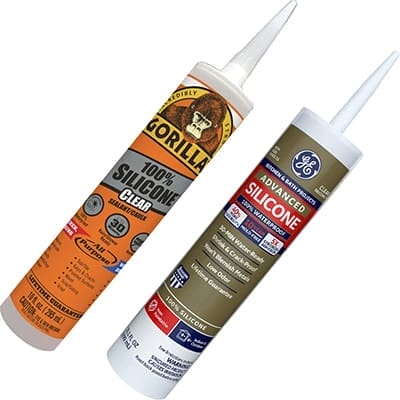
Our favorite tube of silicone caulk is the Gorilla Clear 100% Silicone Sealant Caulk or GE Advanced Silicone 100% Waterproof Caulking.

Applying Caulk Tips | Silicone and Acrylic
So it’s time to apply caulk around your house, from kitchens and baths to living areas. The first thing is to make sure your work area is dry and free of moisture and dirt. If there is any old caulk, remove it with a utility knife.
Before laying down a bead of caulk, you have to make sure you have the right tools and the right tube of caulk for the job. For moisture-prone areas, always stick to silicone caulk. our favorite tube of silicone caulk is the Gorilla Clear 100% Silicone Sealant Caulk or GE Silicone waterproof. For everywhere else we would recommend using an acrylic caulking product like White Lightening Advanced Caulking.
When it comes to the tools, you will need:
How Do You Caulk Smoothly? Interior Caulking Tips
Step 1. Use a utility knife or painter’s tool to dig out the old cracking caulk. Make sure the area is clean of debris and dry.
Step 2. If you are new to caulking and want to achieve a perfect caulk line, apply painter’s tape. Make sure to remove the tape after you apply your caulking.
Step 3. Cut the tip of the caulk tube at a 45-degree angle. The angled hole should be the size of the gap you want to fill. So we recommend cutting a small hole first and making it larger if you need to.
Step 4. Use a caulk gun! Load the caulking tube into the gun.
Step 5. Apply the caulk. Position the tip of the caulk tube at the starting point, squeeze the trigger gently, and consistently move the gun along the gap line. Try to create a smooth continuous level of caulk.
Step 6. Finally, go over the caulking with a smoothing tool if you have one. You can also use your finger if you want. If you are working with silicone, wipe the area with a rag and clean up any excess with denatured alcohol.

